Many venues use Keynius to offer lockers to visitors. It works great — until you have to keep the Keynius events in sync with your actual show schedule. Dates change, extra shows get added, artwork gets updated, cancellations happen… and suddenly your Keynius reservation pages no longer match what’s on your website.
That’s exactly why I’m happy to announce the new Keynius integration in Jeero.
With this integration enabled, Jeero automatically creates (and keeps updating) Keynius events based on the events you already import into your website. As a result, every event can get its own Keynius reservation link — without manual work.
This integration is now available for any venues with one of the supported ticketing platforms, such as Stager, ActiveTickets, Ovatic, Ticketmatic or Tixly. Keynius is an Add-on for Jeero. To enable it, you’ll need an active Jeero subscription with the Keynius upgrade.
Manually creating events in the Keynius web interface means copying titles, dates, times, images and settings over and over again. It’s not just time-consuming, it’s risky: one missed update can confuse visitors and staff.
Jeero fixes this by keeping Keynius in sync with your event data:
This way, your locker reservation flow stays aligned with your real schedule.
Once enabled, Jeero creates/updates the Keynius event in the background and stores the reservation link, so you can show it on your event pages (or in your custom templates) just like any other event field.
Bibelot is already using the Keynius integration with Jeero. On their website, every event page shows a “Reserveer een locker” button. When a visitor clicks it, they’re taken directly to the matching locker reservation page on the Keynius platform for that specific event.
That’s the key benefit: the locker link is generated per event and stays available across your entire program, without manually creating and maintaining Keynius events one by one.
Jeero is a WordPress plugin that makes importing and updating event data from ticketing platforms simple and reliable. It keeps your website current with minimal effort and no coding required. With the new Keynius integration, Jeero can now also keep your locker reservation links up to date automatically.
Once Keynius is enabled, Jeero makes the link available as {{keynius.link}}. There are two easy ways to show it on your site:
{{keynius.link}}
If your calendar integration has a Description (Twig template) field, you can append the button markup to the end of that existing description template.
{% if keynius.link %} <p> <a href="{{ keynius.link }}" class="button" target="_blank" rel="noopener">Reserveer een locker</a> </p> {% endif %}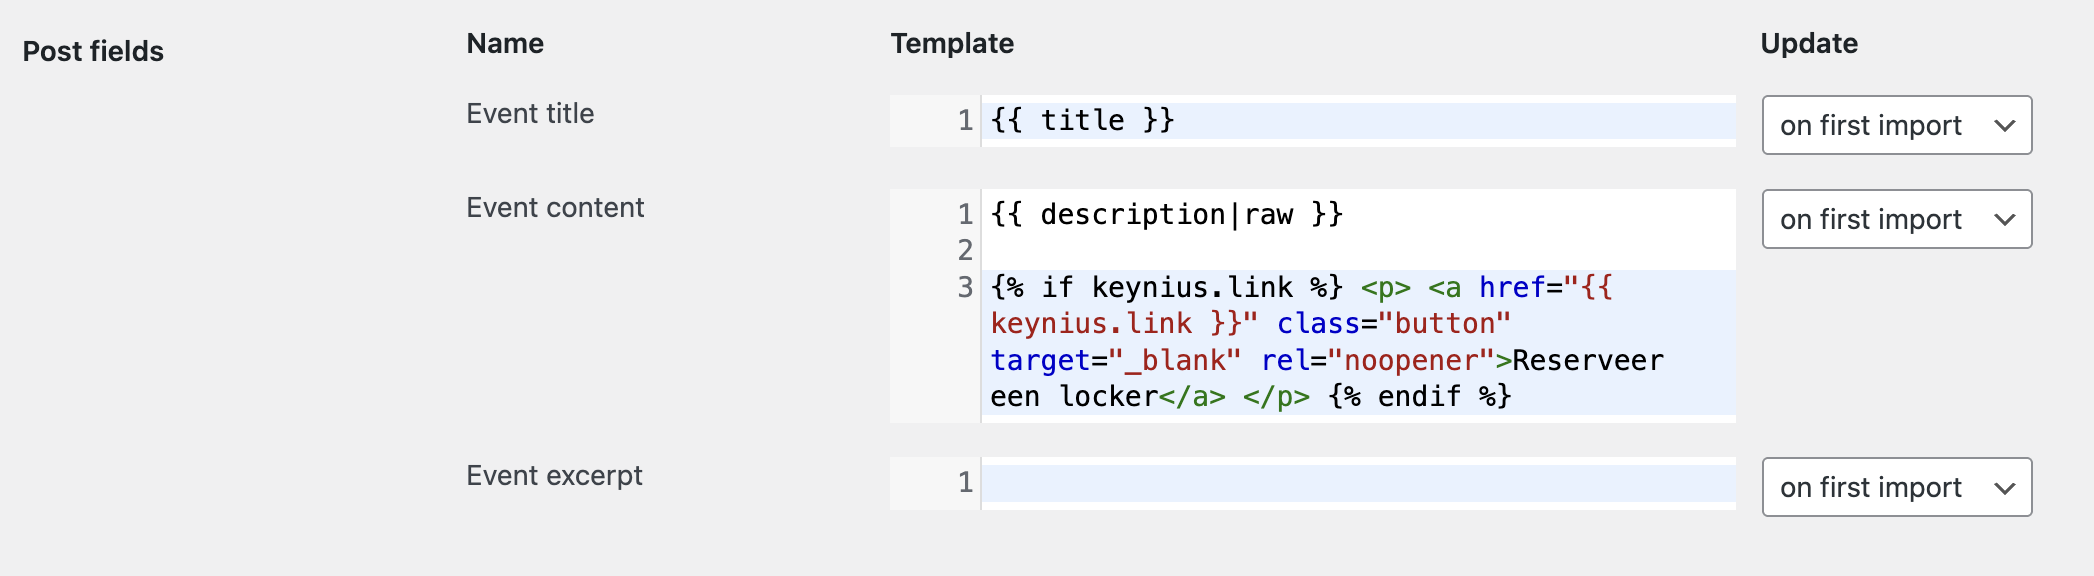
Tip: keep it conditional
Wrapping it in {% if %} ensures you only show the button when Jeero has a Keynius reservation link available for that event.
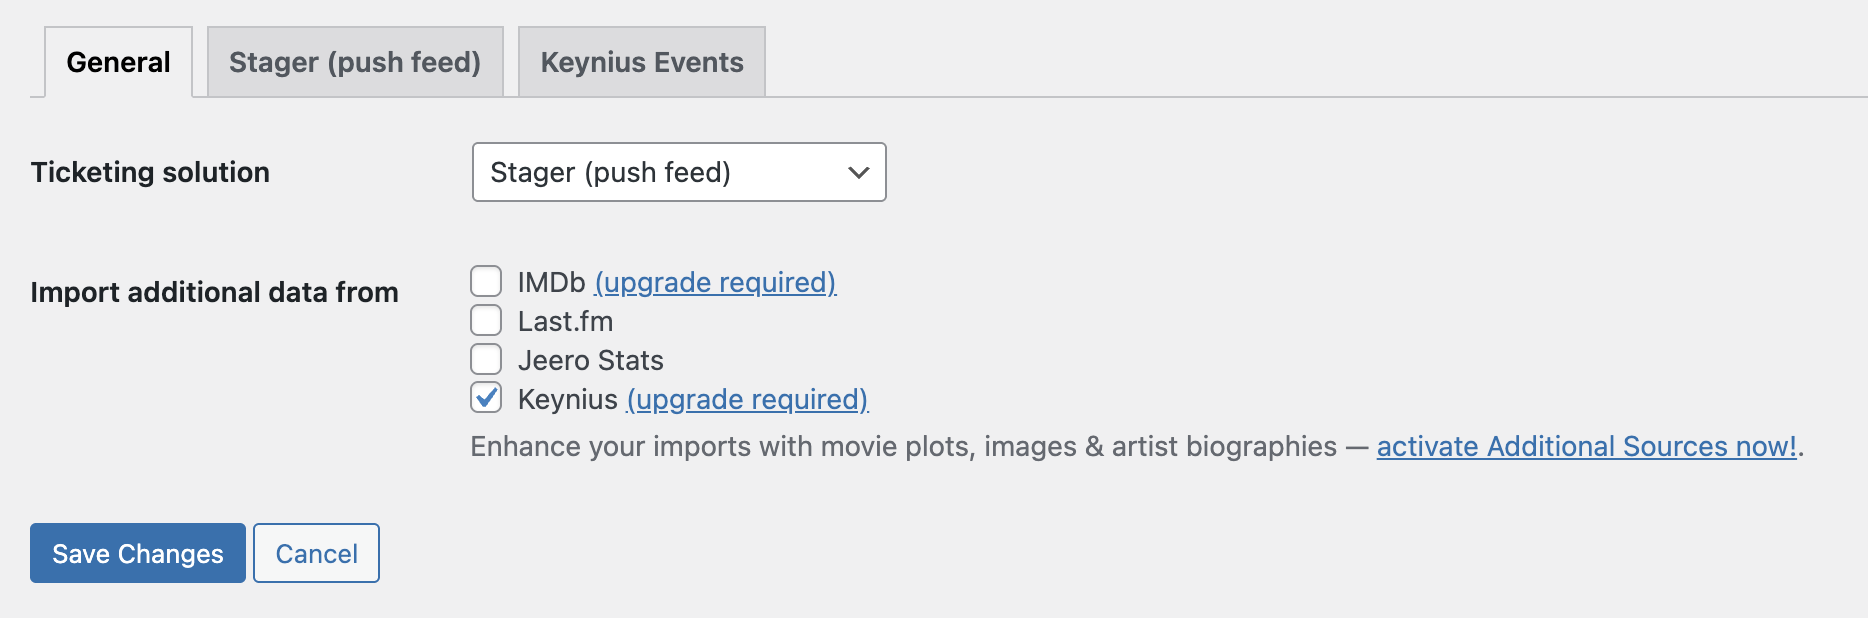
Before you start: make sure you’ve purchased and activated the Keynius upgrade for your Jeero subscription.
Pick the setup that matches how you currently manage events.
Nice — enabling Keynius is quick.
You now have Keynius reservation links available for your events, maintained automatically as event data changes.
If your website imports events using a custom script, it usually means your events are stored in a custom post type with custom fields, and the import is maintained by a developer or agency. This works — but it also means adding Keynius links requires extra custom work.
With Jeero, you can either:
If you want the smoothest route (and the least maintenance), migrating the import to Jeero is the best option.
{{keynius.link}} in content).If you’re not sure whether Jeero can match your current custom fields 1:1, email me at jeroen@slimndap.com and I’ll help you map it.
If you’re adding events manually (for example in WordPress events, a custom post type, or another events plugin), you probably don’t have an automated source feeding Jeero yet.
In that case, step one is to connect Jeero to your ticketing platform so Jeero can keep the event data up to date automatically. Once Jeero imports your events, Keynius links can be generated and stored per event.
{{keynius.link}}).That’s a little bit more tricky. Please contact me, so I can have a look and propose a possible approach: jeroen@slimndap.com.
Jeero can still support your needs even if you’re not using WordPress — reach out and I’ll help you figure out the best setup for Keynius links.
After you enable the Keynius integration and trigger an import/sync, Jeero creates or updates the Keynius event and stores the reservation link. In most cases you’ll see the link appear within a couple of minutes, depending on how quickly your events are imported.
Yes. The Keynius integration requires the Keynius upgrade on your Jeero subscription.
Yes — email me at jeroen@slimndap.com with your site URL and the ticketing platform you use (Stager, ActiveTickets, Ovatic, Ticketmatic or Tixly), and I’ll help you get it set up.
Please contact me so I can add your ticketing solution too.
